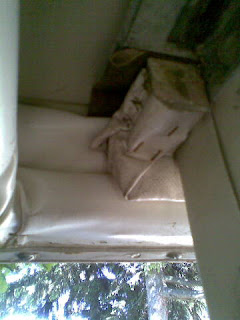
This picture shows the area to the front of the door, with all the bag seal/flap system removed. There was also some tacked on wooden trim a few inches above the flap that had pieces missing, and we didn't replace it.

This picture shows the new flaps we purchased from Trailmanor, waiting to be installed.

Here we have installed by glueing with Liquid Nails Ultra Polyurethane adhesive the solid vinyl boards that we ripped to fit. These were bought at Home Depot, and were found in the trim department. They were intended to be baseboard in a wet area and all we had to do was remove a small (about 1/2") of decorative edge to make it into a "board". DH drilled pilot holes and screwed and clamped them to the walls.

Then I stapled (with an electric stapler, a manual one wouldn't do the job) the bag seal purchased from TrailManor to the vinyl "wood", using 3/8" T-50 stainless steel staples. I lined the edge of the bag seal up with the bottom edge of the "wood", which in turn lined up with the bottom edge of the upper shell. I used a hot glue gun to glue the square foam rubber strips onto the bag seal. In order to get the staple gun in the the tight quarters when working close to the back of the shell, i.e. near the door or sink area, we had to remove the acorn bolts and carefully prop the shell up with a 2x4 resting on the lower walls, all the way across the camper. I forgot to take a picture of that, sorry!

Then folded the bag seal down and around the foam.

Folded the raw edge of the vinyl over, and stapled it to the underside of the wall. I started stapling it to the vinyl, but DH had me fold it less so that it was more covering the wood strip between the aluminum skins.


I had to cut and fit to make it around the corners, and also had to add another layer of padding/vinyl in the corners, as there was a gap.

In progess.

Completed bag seal, ready for the flaps!


1 comment:
Great blog. Just getting ready to start rebuilding a TM 25 myself. Great info here, it gives me a place to start. How much have you spent so far?
-Micah
Post a Comment